
How to Create Pages in Shopify Without the Asset API: A Guide to App Proxies and React

I remember the time when creating a page in Shopify was a piece of cake. All you had to do was create a JSON template and a Section file using the Asset API, and voilà! You were ready to roll. But then came the plot twist: Shopify deprecated the Asset API.
While they had their reasons — tidying up the closet, so to speak — it left many of us scratching our heads. How do we create new pages without it?
The responses I got from both GPT and Google were as clear as mud. After a dive into the Shopify Dev Docs, I finally unearthed the answer. But let’s be real — if you’re new to the Shopify ecosystem, Liquid, apps, and extensions, this process can feel about as unintuitive as disassembling modern smartphones.
So, after cracking the code on page creation, I did what any fresh-faced web dev with a couple of years of experience would do — create a blog!
Now lets jump right into the solution…
App Proxy: Your New Best Friend
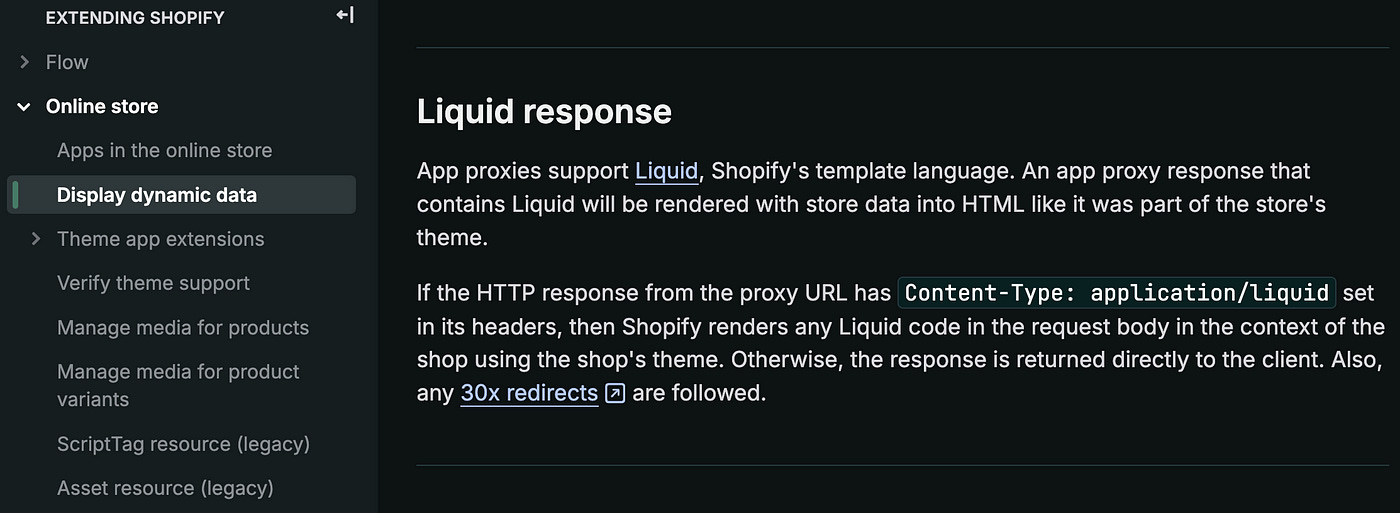
App proxy is this wonderful tool that Shopify provides which can be used in literally countless ways from helping in storefront auth to creating APIs and like this help doc specifies — to display dynamic data. And that is what we will do, by sending Liquid response in App proxy requests.
A step by step guide: Creating the App and Liquid Page
Requirements
You’ve worked with HTML, CSS, JS, NodeJS, Express and React.
You’ve created a Shopify Partner account and have a development store.
Installed Shopify CLI in your system
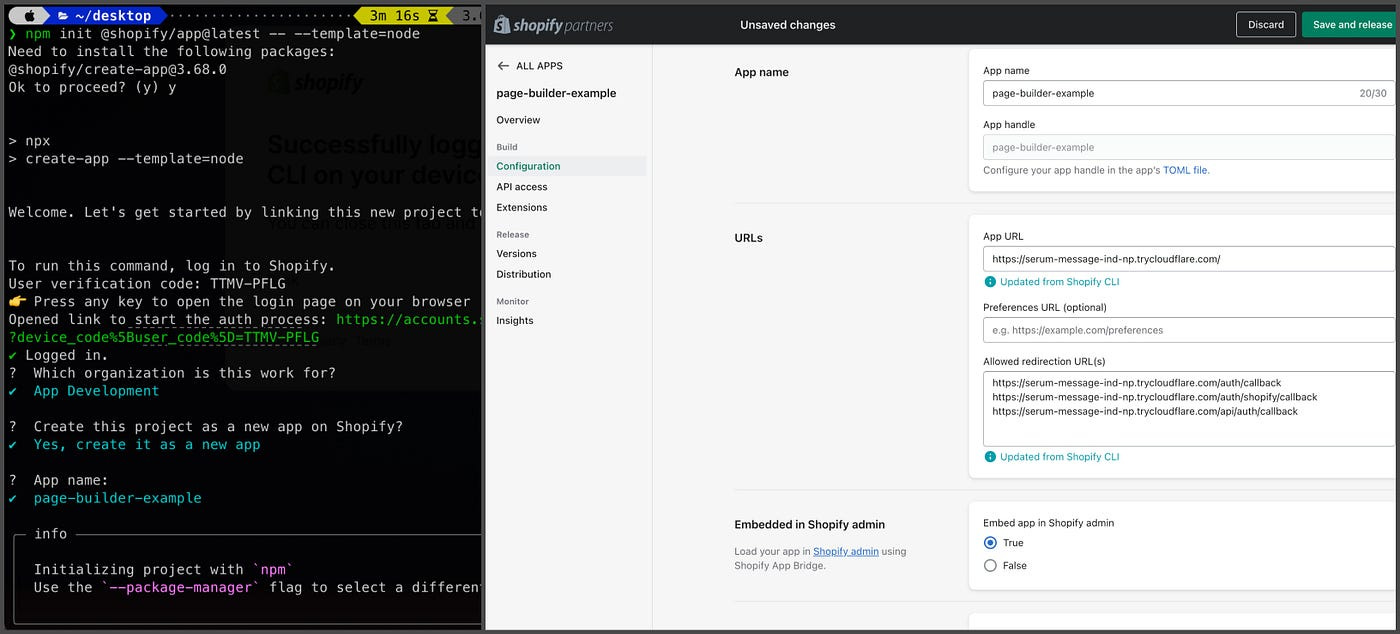
Step 1 — Scaffolding the Shopify app using Shopify CLI
Shopify guides are pretty easy to follow for scaffolding a Shopify App from pre built templates.
Follow the readme from the
Express App TemplateMake sure you’re using Ruby version 3.0.0 or above
npm init @shopify/app@latest -- --template=node
npm i
npm run dev
Select your development store and choose “Yes” for automatically updating URLs. Check the App URL in the Shopify App Portal; we’ll use this for our App Proxy.
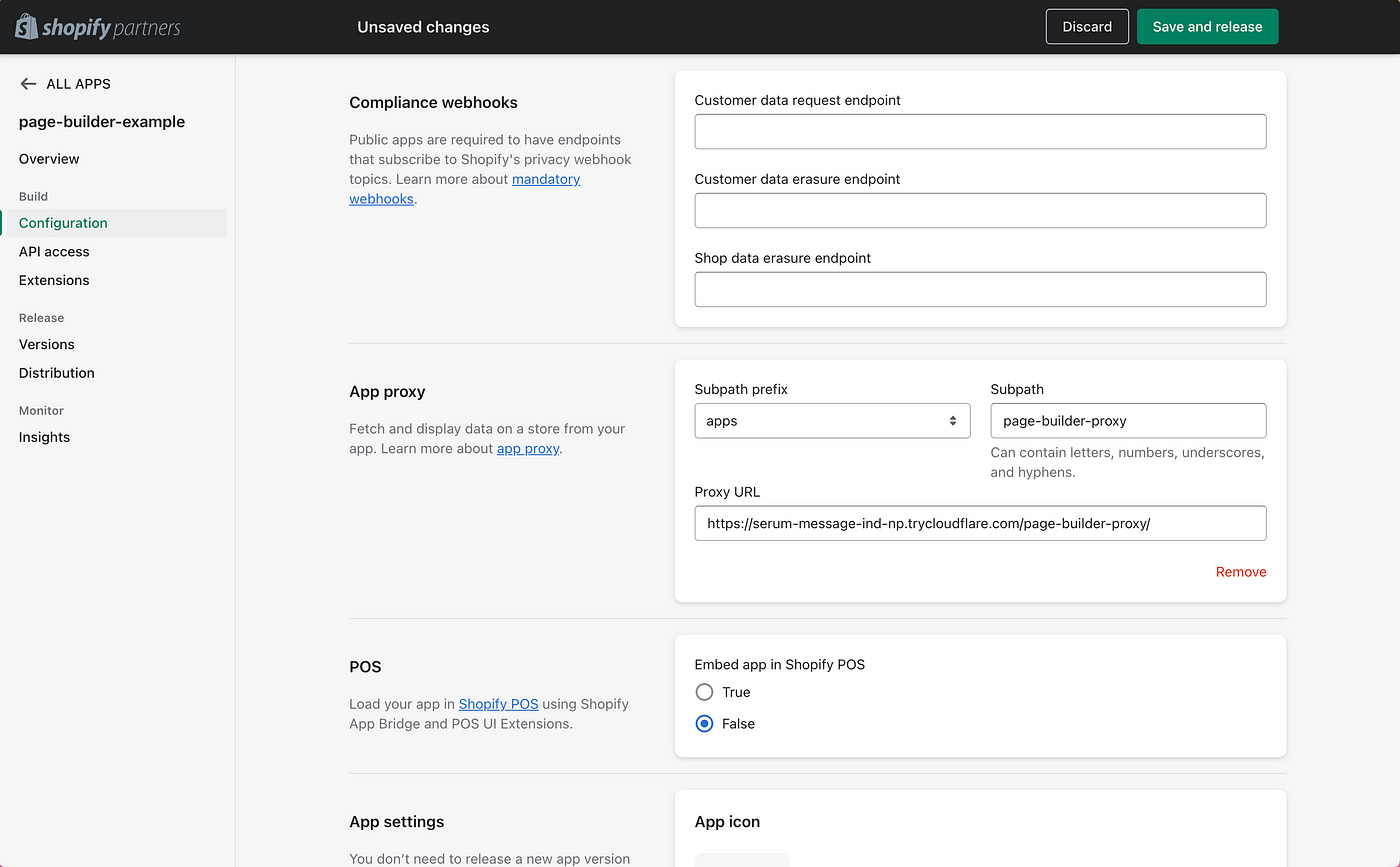
Step 2 — Creating the App Proxy
In the same page scroll down to the App Proxy section, paste the App URL and append
/page-builder-proxy/to the path. This is where we’ll send Liquid data for Shopify to render.
Note: In production, replace these URLs with your app’s hosted URLs, but for now, we’ll use these for development and testing.
Step 3 — Creating the liquid page
Create a Liquid file in your
webfolder, naming itmypage.liquid:
<div id="page-builder-root">Hello World!</div>
<script>
  console.log("Hello World!");
</script>
Think of Liquid like an HTML page — you can use HTML, CSS, and JS, along with access to Shopify’s Liquid objects like Customers and Products.
Step 4 — Hosting the liquid page with an App Proxy API
Now we can add the route for our page in our server where this liquid file can be served from.
Add the route for your Liquid page in
index.js:
app.get('/page-builder-proxy/*', async (req, res) => {
  res.setHeader('Content-Type', 'application/liquid');
  try {
    res.status(200).send(
      readFileSync(join(`${process.cwd()}/`, 'mypage.liquid'))
    );
  } catch (error) {
    res.status(401).send('ERROR ' + error);
  }
});
Note: Ensure to add authentication for the App Proxy in production.
Update your frontend code in
frontend/vite.config.jsto handle App Proxy requests:
export default defineConfig({
root: dirname(fileURLToPath(import.meta.url)),
plugins: [react()],
resolve: {
preserveSymlinks: true
},
server: {
host: 'localhost',
port: process.env.FRONTEND_PORT,
hmr: hmrConfig,
proxy: {
'^/(\\?.*)?$': proxyOptions,
'^/api(/|(\\?.*)?$)': proxyOptions,
'^/page-builder-proxy(/|(\\?.*)?$)': proxyOptions
}
}
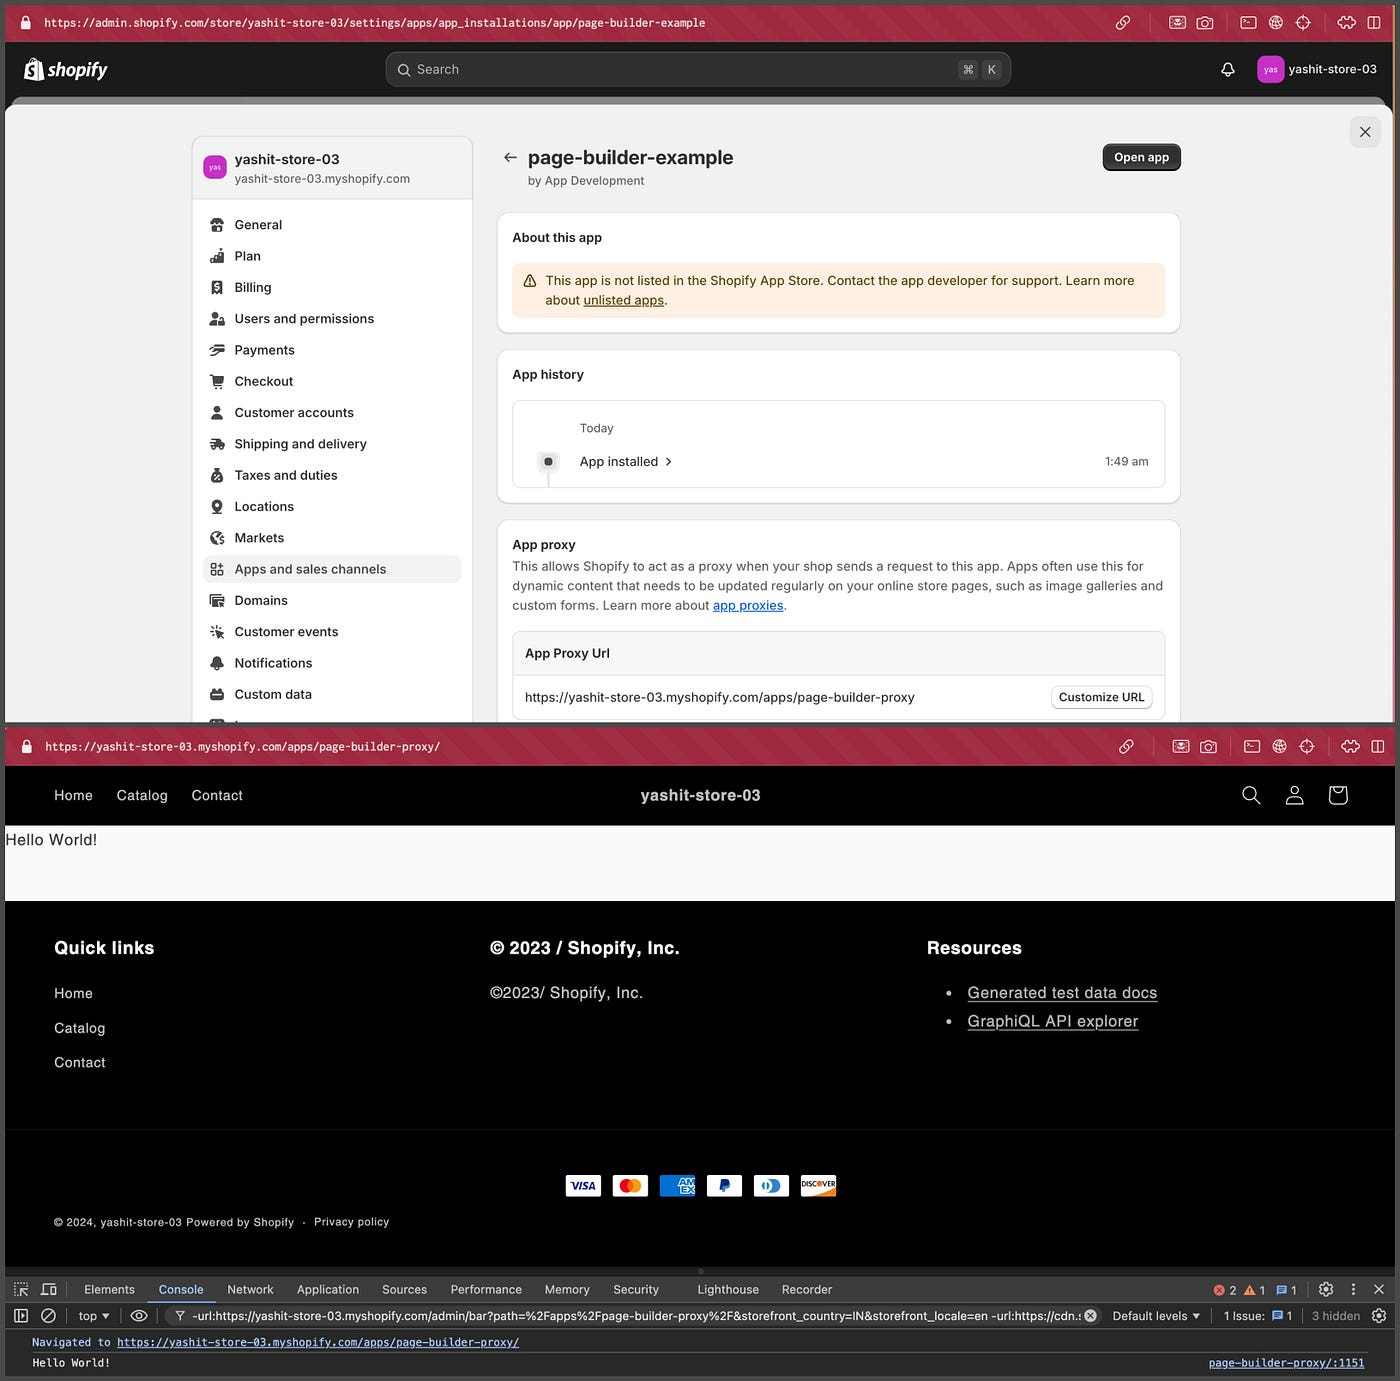
});Step 5 — testing our new liquid page
Navigate to your storefront at
yourshop.myshopify.com/apps/page-builder-proxy. You should see "Hello World!" rendered on the frontend and printed in the console.We can check the app proxy url in the store’s admin settings as well.
Go to Settings → Apps and sales channels → Click on Your app name
And there you have it! With the App Proxy and Liquid files, you can create as many pages as you want in Shopify.
Bonus
A Page Creation Recipe: Mixing React and Extensions
We can take it a step further by leveraging the features of Theme App Embed Extensions and React. Theme App Embed allows merchants to customize their pages seamlessly and go live at their convenience.
By using React, you can bundle your components into JavaScript, which the extension can then render on the storefront.
Step 6 — Creating the theme app embed extension
Let’s get started on creating our extension. For more detailed guidance, refer to the Shopify documentation on Theme App Extensions, which clarifies the difference between Theme App Embed and Theme App Block Extensions.
In short, the App Embed is a script that can be injected into the head or body of any Shopify page.
To generate your extension, run:
shopify app generate extension
Step 7 — Creating the React page with Vite as Bundler
Now we will scaffold a
viteproject withreactas our template. This will be for the frontend of our page and be used by our extension so I name itextensions-ui
npm create vite@latest extensions-ui -- --template reactRename the Root Element: In
main.jsx, change the root element's ID topage-builder-root:We have used the same id
page-builder-rootinmypage.liquid
import { StrictMode } from 'react';
import { createRoot } from 'react-dom/client';
import App from './App.jsx';

createRoot(document.getElementById('page-builder-root')).render(
  <StrictMode>
    <App />
  </StrictMode>,
);
Update
App.jsxandApp.cssfor our example page
import { useState } from 'react';
import './App.css';

function App() {
  const [count, setCount] = useState(0);

  return (
    <div id='page-builder-container'>
      <h1>Vite + React</h1>
      <div className="page-builder-card">
        {window.pageBuilderCustomer.customerLoggedIn  &&
          <>
            <p>
              Hello { window.pageBuilderCustomer.firstName }
            </p>
            <p>
              Your Email: { window.pageBuilderCustomer.email }
            </p>
          </>
        }
        <button onClick={() => setCount((count) => count + 1)}>
          count is {count}
        </button>
      </div>
    </div>
  );
}

export default App;
#page-builder-container {
display: flex;
flex-direction: column;
align-items: center;
justify-content: center;
}
.page-builder-card {
padding: 2em;
text-align: center;
}Configure Bundling Rules: Adjust the
vite.config.jsinextension-uito bundle your React app into a compact JS and CSS file in theextensions/assetsfolder:
import { defineConfig } from 'vite';
import react from '@vitejs/plugin-react';

// https://vitejs.dev/config/
export default defineConfig({
  plugins: [react()],
  build: {
    cssCodeSplit: false,
    rollupOptions: {
      input: {
        app: './src/main.jsx'
      },
      output: {
        assetFileNames: 'page-builder-[name].[ext]',
        chunkFileNames: 'page-builder-[name].js',
        entryFileNames: 'page-builder-[name].bundle.js',
        dir: '../extensions/page-builder-extension/assets/',
        format: 'iife'
      }
    }
  }
});
Now we will build our React App and bundle it.
npm run buildThis will save
page-builder-app.bundle.jsandpage-builder-style.cssfiles in our assets folder.
Step 8— Injecting the React page with our extension
Now, let’s add the code to our extension for injecting the React bundle.
Navigate to the Extension Files: Go to the
extensions/your-extension-name/blocksdirectory. The files in this folder are the root Liquid files of your extensions.Rename the Liquid File: Rename the existing file to
page-builder-proxy.liquidand paste the following code into it:
{% if request.path contains '/page-builder-proxy/' %}
  <script defer src={{ 'page-builder-app.bundle.js' | asset_url }}></script>
{% endif %}

{% if customer.id %}
  <script>
  window.pageBuilderCustomer = {
    "customerLoggedIn": true,
    "customerId": "{{ customer.id }}",
    "email": "{{ customer.email }}",
    "phone": "{{ customer.phone }}",
    "firstName": "{{ customer.first_name }}",
    "lastName": "{{ customer.last_name }}",
    "acceptsMarketing": "{{ customer.accepts_marketing }}"
  };
  </script>
{% else %}
  <script>
  window.pageBuilderCustomer = {
    "customerLoggedIn": false,
  };
  </script>
{% endif %}

{% schema %}
{
  "name": "Page Builder Pages",
  "target": "body",
  "stylesheet": "page-builder-style.css",
  "settings": []
}
{% endschema %}
Step 9 — Deploy the extension to Shopify using
npm run shopify app deployOr run it in dev mode which deploys the extension
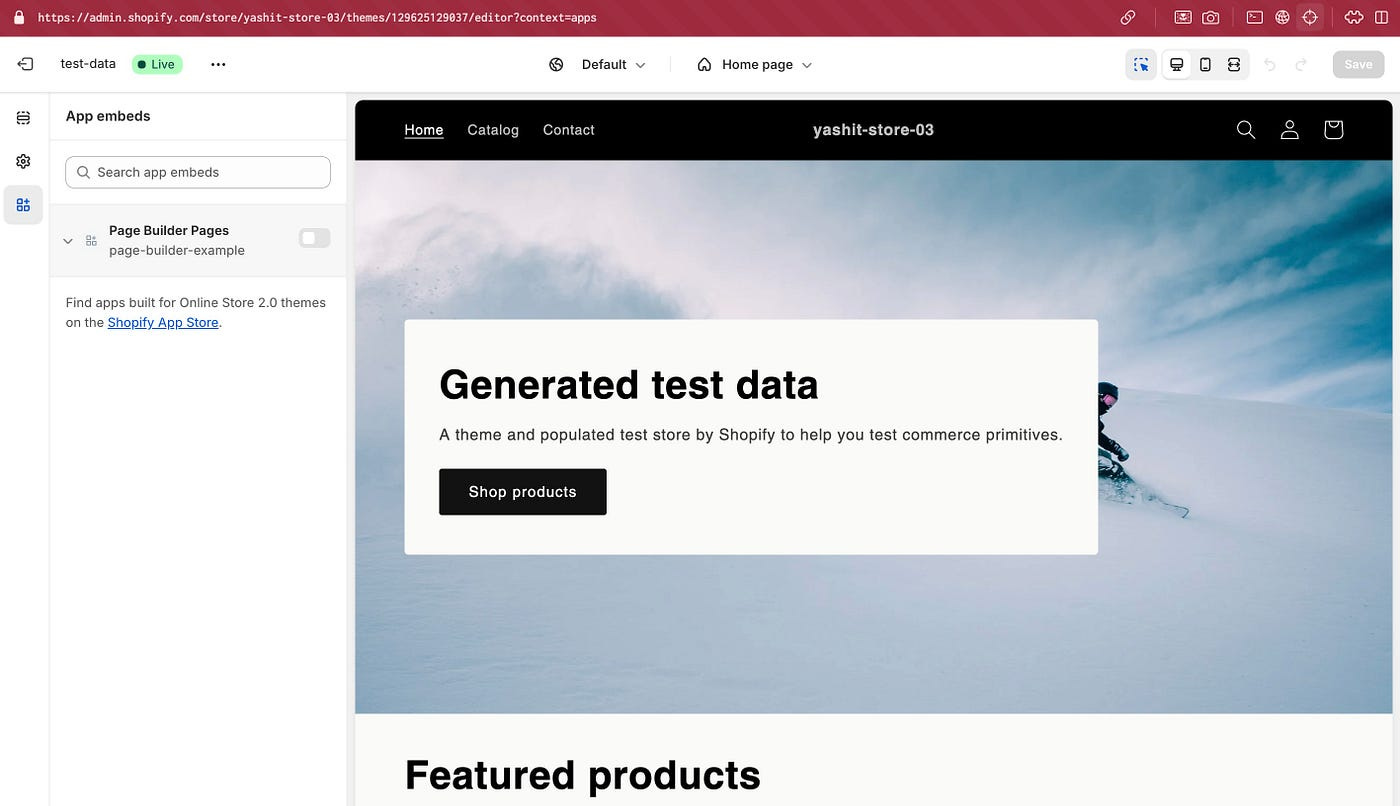
npm run devStep 10 — Enable the Theme App Embed in your test store
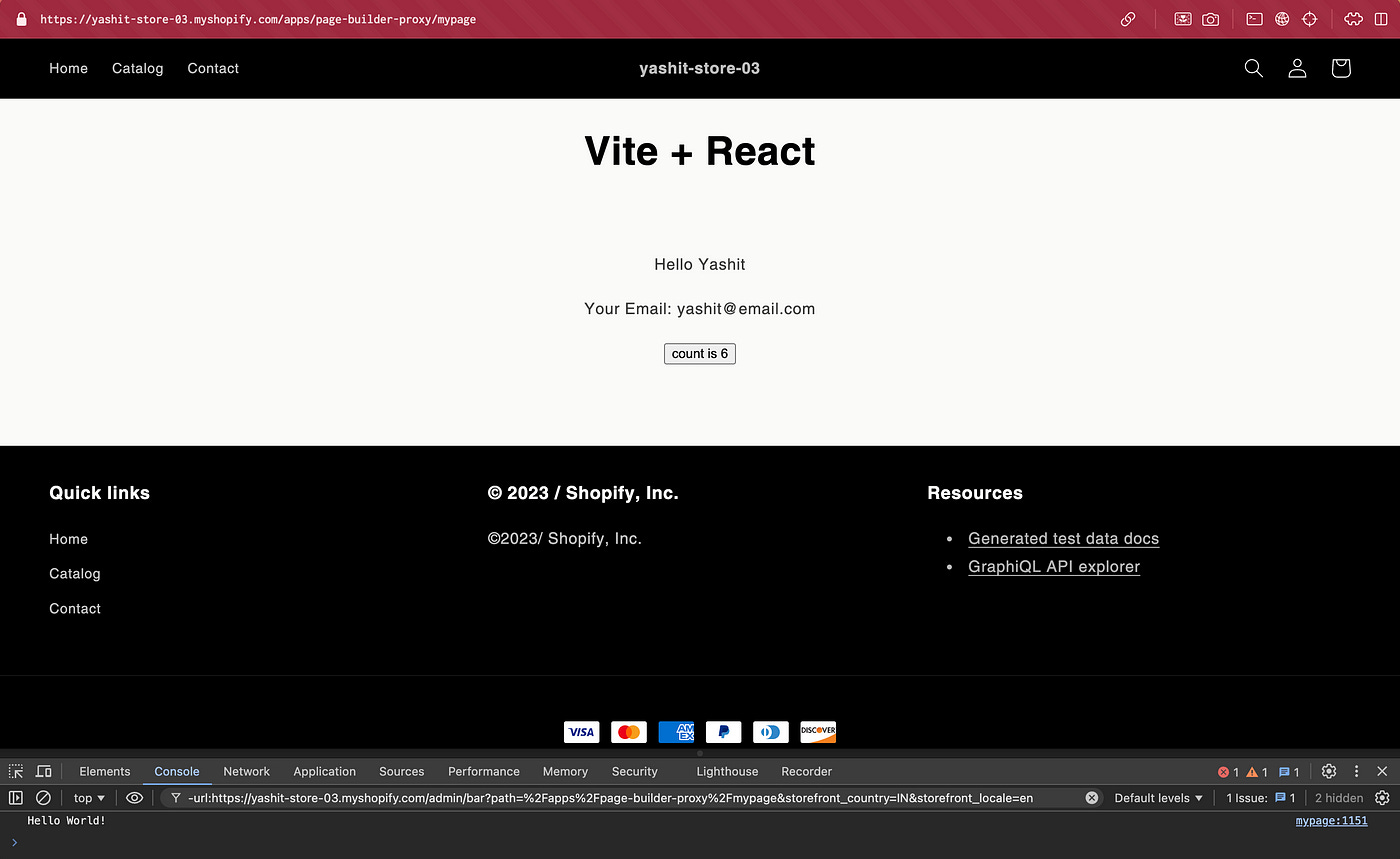
Step 11 — Check our new React page in Storefront
Step 12 — Access the Page in Theme Editor
With theme editor we can add settings to our Extension Schema to let the Merchants customize the page for their Storefront.
Navigate to the Theme Editor: Go to
Online Store — Theme-CustomizeIn the URL we can add preview path for our page by encoding the page path and adding it to the
previewPathquery param
encodeURIComponent("/apps/page-builder-proxy/mypage")

// Add the param to the url
.../editor?previewPath=%2Fapps%2Fpage-builder-proxy%2Fmypage&context=apps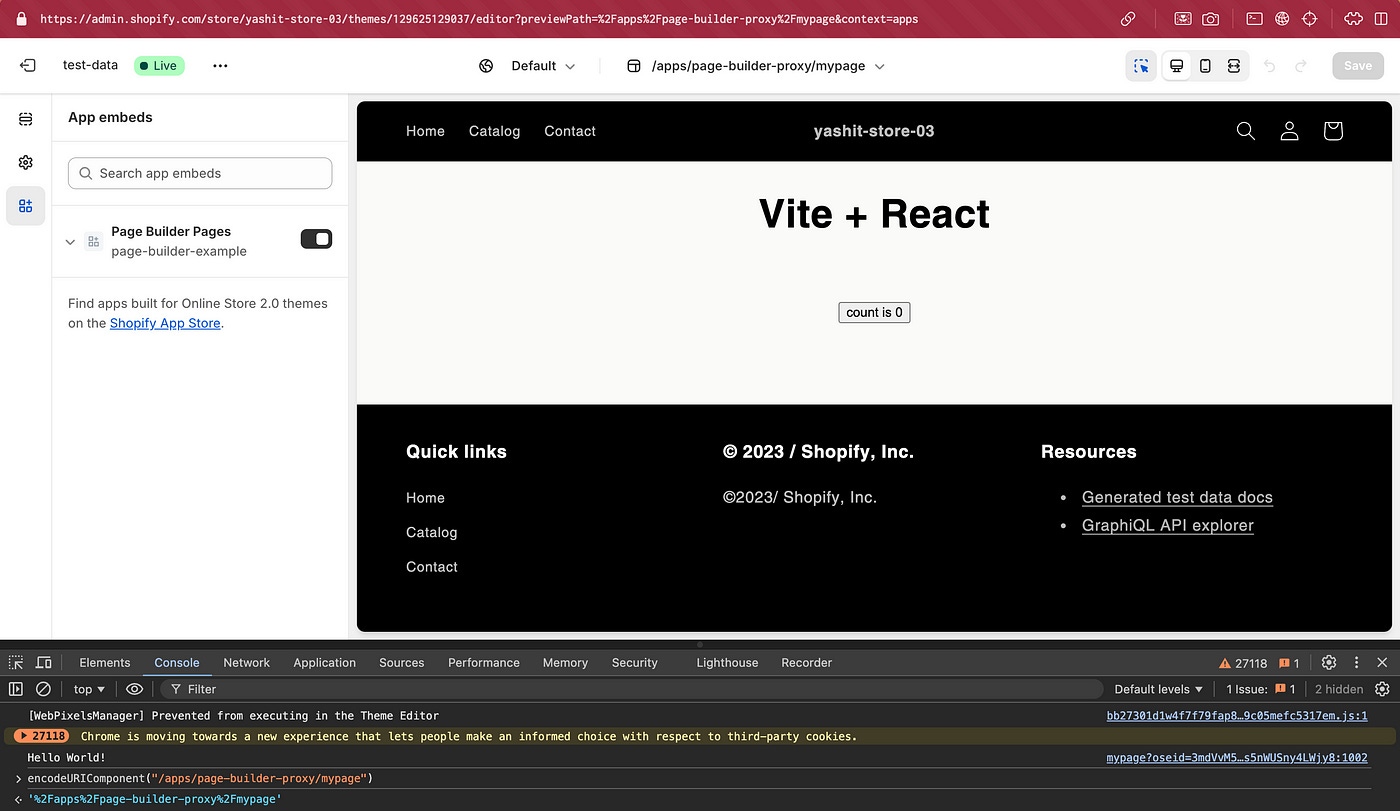
Congratulations on creating your new dynamic page with React!
We’ve developed a flexible solution that allows you to code easily in React while leveraging all the fantastic features Shopify provides for app developers.
If you’re coming from the world of other e-commerce giants like Magento or WooCommerce, which offer full access and fewer restrictions, I feel you, truly. But here’s the thing — embrace the new tools at your disposal! Let your creativity flow like the Liquid you’re about to work with, and explore the unique possibilities that Shopify has to offer.
Happy coding!
Some helpful links
Repo with all the code mentioned above — https://github.com/RedMonkWorks/page-builder-example
Shopify App — Express NodeJS template — https://github.com/Shopify/shopify-app-template-node
App Proxy — https://shopify.dev/docs/apps/build/online-store/display-dynamic-data#liquid-response
Theme App Extensions — https://shopify.dev/docs/apps/build/scaffold-app